
Quick answer:
The right way to size a ductless mini-split is to have a pro perform a room-by-room Manual J load calculation that considers square footage, insulation, window type/orientation, air leakage, occupancy, and how the space is used. Most homes need one indoor unit per distinct zone (a room or open area with similar heating/cooling needs). Oversized units short-cycle and waste energy, while undersized units run constantly and struggle in extreme weather.
In the article below, we explore each of these points in detail.

What exactly is a ductless mini-split and how does it deliver comfort?
A ductless mini-split is a heat-pump system made up of an outdoor unit and one or more compact indoor units (often wall-mounted). Refrigerant lines connect the two. Instead of pushing air through ductwork, each indoor unit conditions the air right in the room. That’s why mini-splits excel in bedrooms, home offices, studios, bonus rooms, and accessory dwelling units (ADUs). Because each indoor head modulates independently, you get zoned comfort and better control over energy use.
Why is “Manual J” the gold standard for sizing a mini-split?
Rules of thumb like “X BTU per square foot” ignore crucial variables. A Manual J load calculation accounts for:
- Floor area and ceiling height (volume)
- Insulation levels in walls, attic, floors
- Window size, glazing type, and orientation (solar gain)
- Infiltration (how leaky the envelope is)
- Internal loads (people, lighting, electronics, appliances)
- How each room is used (kitchen vs. bedroom vs. gym)
This engineering-based method yields a cooling and heating load for each room. Your contractor then selects equipment that closely matches those loads, typically using manufacturer performance data at specific indoor/outdoor temperatures and fan speeds.
How do you decide how many indoor units (zones) you need?
Think in terms of thermal zones and areas that share similar loads. You’ll usually want:
- One indoor unit per closed-door room that’s regularly occupied (e.g., primary bedroom, office).
- One indoor unit for each large open-plan area (e.g., kitchen/living/dining combined).
- One or more units for accessory spaces (e.g., studio, workshop, ADU), often sized independently to avoid over-conditioning the main home.
If two rooms have similar loads and doors are typically left open, a single head might work. If doors stay closed, or one space gets heavy afternoon sun while the other doesn’t, separate heads give better control and comfort.
Single-zone or multi-zone: which approach is better?
Here’s how you can determine if you need a single- or multi-zone system:
Single-zone systems pair one outdoor unit with one indoor head. They’re often more efficient per zone and keep refrigerant paths short and simple. If one zone needs service, the others are unaffected.
Multi-zone systems connect multiple indoor units to one outdoor unit. They save exterior space and can look cleaner. However, some multi-zone setups lose efficiency when only a single head calls for conditioning. The best choice depends on your loads, layout, and outdoor space constraints. A professional can model both options and show you the tradeoffs.
Where should indoor units be mounted for the best performance?
Placement drives comfort and efficiency. Aim to:
- Position high on a wall to promote good air mixing.
- Avoid direct obstructions such as tall bookcases or bulkheads.
- Steer clear of heat sources (ovens, halogen lights) and humid areas that can affect sensors.
- Face into the room, not at an exterior wall, and avoid blowing directly onto a bed or sofa.
- Consider ceiling cassette or low-wall units where wall space is limited or aesthetics are top priority.
Each indoor head needs a clean path for the refrigerant lines, a condensate drain, and electrical connections. Good design keeps runs short, tidy, and serviceable.
What about the outdoor unit — where should that go?
Pick a spot with good airflow and easy service access. Best practices include:
- Maintain clearances on all sides and above the unit per manufacturer specs.
- Keep it off the ground with a pad or wall brackets to protect from debris and snow.
- Minimize line-set length to preserve capacity and efficiency.
- Route the condensate and ensure proper drainage.
- Be thoughtful about sound — mini-splits are quiet, but placement still matters near sleeping areas and patios.
How can you tell if a mini-split is oversized or undersized?
Watch for these signs to determine if your current system is over- or undersized.
Oversized systems often short-cycle. They start, cool or heat quickly, and shut off repeatedly. Signs include temperature swings, clammy air in cooling mode (poor dehumidification), and frequent compressor starts.
Undersized systems run nearly nonstop in extreme weather, may never hit setpoint, and can accumulate frost or struggle with defrost cycles in cold snaps. Both scenarios waste energy and shorten equipment life.

Can a mini-split handle both heating and cooling effectively?
Yes. Most modern mini-splits are inverter-driven heat pumps that modulate output to match real-time demand. Many maintain strong heating capacity even in colder weather. Key considerations:
- Cold-climate ratings: Look for published capacity at low outdoor temperatures, not just “nameplate” BTUs.
- Defrost strategy: Quality systems manage coil defrost efficiently without big comfort dips.
- Backup heat: In very cold regions or for poorly insulated spaces, some homeowners pair a mini-split with a supplemental source for rare extremes.
Is a ductless system the best choice for an ADU or garage conversion?
Frequently, yes. Mini-splits are exceptionally well-suited to ADUs, studios, and conversions because they:
- Don’t require ductwork (avoids structural changes and hidden losses).
- Offer independent temperature control separate from the main home.
- Install quickly with minimal disruption.
- Provide whisper-quiet, high-efficiency operation in compact spaces.
Thoughtful design in small units matters: choose indoor head styles that preserve wall space, plan condensate and line-set routes early, and account for kitchen and bathroom exhaust loads.
How do you plan for humidity control with a mini-split?
Because inverter mini-splits can modulate at low speeds, they typically dehumidify well. To optimize moisture control:
- Use “dry mode” or a low fan speed in shoulder seasons to lengthen coil contact time.
- Avoid oversizing, which reduces runtime and dehumidification.
Keep filters and coils clean for efficient moisture removal. - In high-humidity climates or unique use cases, consider a dedicated dehumidifier for the most precise control.
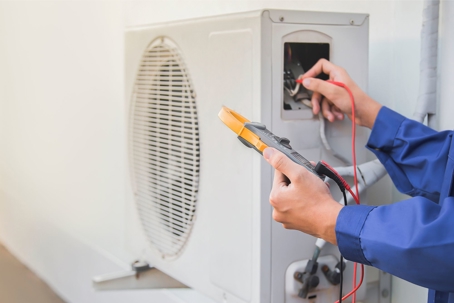
Are there electrical or code issues to solve before installation?
Most installations require:
- A dedicated electrical circuit sized for the outdoor unit’s maximum current.
- Proper disconnects and surge protection per code and manufacturer guidance.
- Correctly sized line-set (diameter and length) and pressure/evacuation steps to manufacturer specifications.
- Permits and inspections where required.
- Thoughtful condensate management (gravity drain or pump, with clean routing).
Working with an experienced installer ensures compliance and protects equipment warranties.
What maintenance keeps a mini-split performing like new?
Mini-splits are low-maintenance, but not no-maintenance. Keep yours efficient by:
- Cleaning or replacing indoor filters monthly during heavy use.
- Vacuuming indoor coil fins lightly if dust accumulates, and keeping the unit casing clean.
- Clearing debris from the outdoor coil and maintaining vegetation clearance.
- Scheduling professional service to deep-clean coils, check refrigerant charge, verify electrical connections, test sensors, and confirm condensate flow.
Consistent care supports quiet operation, stable temperatures, and long equipment life.
What does a professional mini-split installation include?
A quality install should look like this:
- Room-by-room load calculation (Manual J) and equipment selection from manufacturer performance data
- Layout planning for indoor head locations, line-set paths, wall penetrations, and condensate routing.
- Neat line-set management (covers, drip loops, UV-resistant insulation).
- Pressure testing, evacuation, and charging to spec (with documentation).
- Control setup and commissioning, including airflow tuning, setpoint verification, and Wi-Fi integration if desired.
- Walkthrough and training so you know how to use modes, timers, and maintenance features.

Are mini-splits actually efficient in real homes?
Inverter mini-splits shine in real-world conditions because they modulate instead of cycling on/off. This steady operation avoids efficiency losses from frequent starts, maintains more stable temperatures, and often delivers lower energy use than conventional systems, especially when ducts would otherwise run through hot attics or unconditioned spaces.
Can one indoor unit condition multiple rooms?
Sometimes, in open layouts or when doors remain open, one head can serve adjacent spaces. But airflow doesn’t like to turn corners or travel through doorways very well. If you routinely close doors, or if rooms have different solar exposure, each room usually needs its own head for consistent comfort.
Do ceiling cassettes perform differently than wall-mounted heads?
Performance potential is similar when properly sized and sited. Ceiling cassettes can distribute air more evenly in large rooms and preserve wall space, while wall mounts are often simpler to install and service. The best choice depends on structure, aesthetics, and maintenance preferences.
If you’re ready to size, design, and install a ductless mini-split the right way, contact Bud’s Plumbing, Heating, & Air. Our team provides careful load calculations, clean installations, and a workmanship guarantee so your system performs exactly as promised.